Description
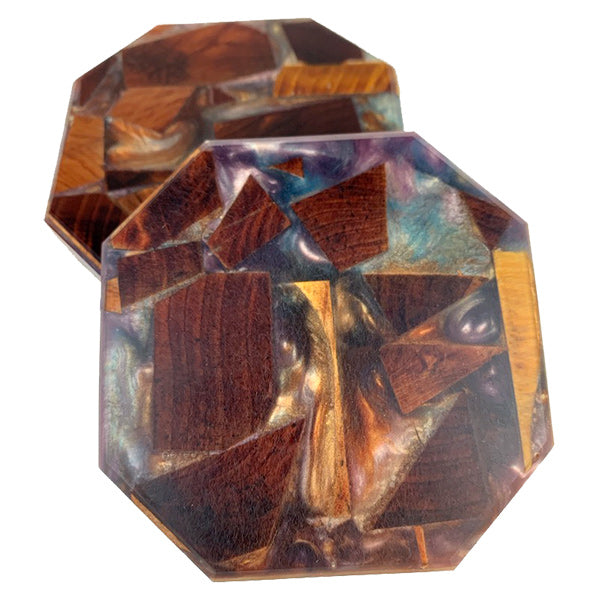
This easy-to-use DIY epoxy coaster kit provides tools and inspiration to create functional works of art so pretty you won’t want to cover them with drinks. Personalize each coaster with embedded objects or colorful designs that’ll create a custom look for your coffee table, bar cart, or bar top. Coasters have a raised lip to provide added protection. Kit includes resin, hardener, epoxy-safe pigments, reusable coaster molds (square and hexagon shapes, approximately 4-1/2″ x 4-1/2″), mixing tools, heat gun, and easy-to-follow instructions. Make them for yourself or make some for your friends, because coasters are a great gift everyone can use!

Simple Instructions for Creating One-of-a-Kind Epoxy Coasters
What You’ll Need:
- TotalBoat Epoxy Coasters Project Kit
- Protective gloves
- A work area protected by plastic sheeting or a silicone pad, to catch any overflow
|
STEP 1 – GET EVERYTHING READY
|
 |
|
STEP 2 – STAY SAFE!
|
 |
|
STEP 3 – MIX RESIN & HARDENER
|
 |
|
STEP 4 – POUR
|
 |
|
STEP 5 – ADD PIGMENTS
|
 |
|
STEP 6 – POP BUBBLES
|
 |
|
STEP 7 – REMOVE YOUR COASTER
|
 |
|
Each coaster has a glossy finish—no polishing needed! |
 |
Get Inspired!
There are so many techniques you can use to personalize these coasters, all that’s required is a little imagination, a willingness to have fun, and a desire try something new! Just remember, as you’re creating your coasters, the top of the coaster is at the bottom of the mold. This means you’ll need to add features upside down to ensure your design is right-side-up when you remove your coaster from the mold! Here are a few ideas to get you started.
 |
Casting Items in Epoxy Embed treasured items or small objects in mixed epoxy to make them appear as if they’re floating or are preserved in a glass-like coaster. If you’re embedding items in the epoxy, seal them first by dipping them in epoxy or by leaving a thin layer on the bottom of the coaster. For this example, we used small pieces of colored sea glass. |
 |
Creating Sparkly Bursts of Color Add intense color and sparkle to your coasters with the included mica powder pigments. Divide mixed epoxy into smaller cups and add a little pigment at a time until the desired color is achieved. Manipulate the design using a wooden stick or use air from the heat gun to move the colors around. |
 |
Creating Droplet Effects and Translucent Colors Use the included alcohol inks to get a droplet effect or a translucent colored look. To create the droplet effect, start by dropping the colors you want into the epoxy. Then add white ink drops on top (the white ink is heavier and sinks the other colors). For a translucent effect, add alcohol ink, drop by drop, until you get the look you want. |
More Details
- TotalBoat High Performance Epoxy is a high-gloss, pourable epoxy
- TotalBoat High Performance Slow Hardener provides extended working time
- Simple 2 to 1 mix ratio makes it very easy to use—even for first-time users
- Epoxy and hardener pumps make it easy to get a perfect mix ratio
- Epoxy self-levels as it cures, leaving a smooth, beautiful finish
- Reusable silicone coaster molds are ideal for resin casting
- Protective epoxy coasters are waterproof, beautiful, and durable
Kit Contents
- 1 Quart TotalBoat High Performance Epoxy Resin
- 1 Pint TotalBoat High Performance Slow Hardener
- 2 – Square molds (Size: 4-1/2″ a 4-1/2″)
- 2 – Hexagon molds (Size: Approximately 4″)
- Black Diamond Powder Pigments Pack #104 (10/pk, assorted colors, 5 grams/pk)
- T-Rex Alcohol Ink Pigments (12 bottle starter pack, 11 vibrant colors and 1 clear blender, 20mL per bottle)
- 10 – 50ml disposable plastic beakers
- 5 – TotalBoat half-quart plastic mixing cups
- 5 –
12cc plastic syringes - Note: Due to pandemic-related supplier shortages, plastic syringes are not available or included with kits.
- 5 – Large wooden stir sticks (Size: 10”)
- 5 – Tongue depressors (Size: 5½” x ⅝”)
- 1 – Heat gun with power cord
- TotalBoat High Performance Epoxy Pumps with instructions
TotalBoat High Performance Epoxy Tech Data
High Performance Epoxy Resin SDS
TotalBoat 2:1 Slow Hardener SDS